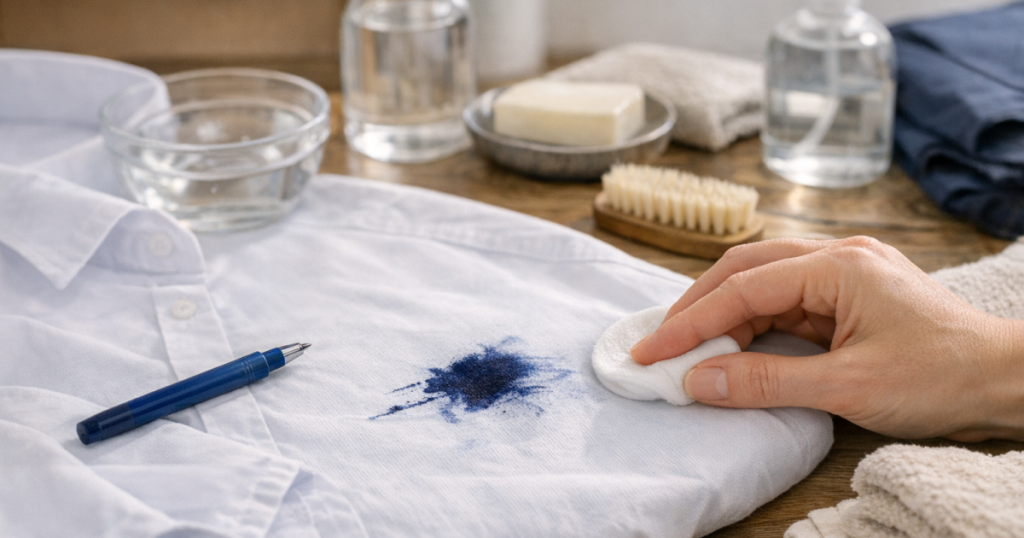
A leaking biro in a chest pocket can make an otherwise clean office uniform shirt look unwearable, but the right order of treatment makes a big difference. You can usually remove ink stains from washable cotton or polycotton shirts by blotting, treating from the back, rinsing, then washing only once the ink has lifted.
The key is to keep heat away until the stain is genuinely gone. Hot water, tumble drying and ironing can drive dye deeper into the fibres, which is why a calm, staged approach works better than scrubbing at the mark in a panic.
The short version
- Act quickly, but do not rub the ink into the weave.
- Put an old white towel or kitchen paper behind the stain so the ink transfers out of the shirt rather than through it.
- Dab with a suitable alcohol-based stain treatment for ballpoint or many gel inks, testing first on a hidden seam.
- Rinse from the back of the fabric, then pre-treat with laundry detergent.
- Wash at the care-label temperature and check the shirt before drying.
Work out what kind of ink you are dealing with
Office uniform shirts usually pick up ink from ballpoint pens, gel pens, rollerballs, fountain pens or permanent markers. They do not all behave in the same way, so it helps to identify the likely source before choosing a treatment.
Ballpoint pen
Ballpoint ink is often oily and dye-rich. It tends to respond well to alcohol-based treatment because the solvent helps loosen the oily binder holding the colour in the fabric. This is the most common shirt-pocket stain in office and reception uniforms.
Gel and rollerball pens
Gel and rollerball inks can spread quickly because they are often more fluid. They may look dramatic at first, especially on white or pale blue shirts, but careful blotting and repeated light treatment can still shift a lot of the mark.
Fountain pen and washable ink
Some fountain pen inks are water-based and may rinse out more easily if treated early. Start with cool water and blotting before moving to stronger treatment, as unnecessary solvent can spread certain dyes.
Permanent marker
Permanent marker is harder. You may reduce the stain, but complete removal is not guaranteed, particularly on polyester blends or shirts with a smooth easy-care finish. Treat gently and avoid chasing perfection if the fabric starts to fade or roughen.
Checks before you start
Uniform shirts are not always simple white cotton. Many are polycotton, stretch blends, easy-iron fabrics, branded shirts with embroidery, or coloured garments that need to match the rest of a team’s workwear. Before treating the stain, make these checks:
- Read the care label: check whether the shirt is washable, the maximum wash temperature and whether bleaching is prohibited.
- Test colourfastness: dab your chosen treatment on an inside seam or hem and press with a white cloth. If colour transfers, stop and use a milder approach.
- Keep treatment away from logos: embroidered logos, printed name badges and heat-applied branding can react differently from the shirt fabric.
- Avoid coloured cloths: use white kitchen paper, a white towel or a clean white cloth so you can see whether ink is transferring.
- Do not dry first: once ink has been through a hot tumble dry or iron, it is usually much harder to shift.
If the shirt is labelled dry-clean-only, avoid home solvent experiments on visible areas. For keeping formal or specialist garments wearable between professional cleans, see our guide to keeping dry-clean-only clothes fresh between wears.
Step-by-step method for washable office shirts
1. Blot the fresh ink
Lay the shirt flat with the stained area facing up. Blot gently with white kitchen paper to remove any surface ink. Press and lift rather than rubbing. If the mark is in a pocket, put your fingers inside the pocket and separate the layers so the ink does not transfer to the back of the shirt.
For a very fresh spill, hold the back of the stain under cool running water for a short rinse. This pushes some of the ink out the way it entered. Do not blast water through the front of the stain, as that can spread the dye across a larger area.
2. Put an absorbent layer behind the stain
Place a folded white towel, several sheets of kitchen paper or a clean absorbent cloth underneath the stained area. The aim is to draw the ink out of the fabric and into the absorbent layer. Move to a clean patch of towel as ink transfers; otherwise, you can push dissolved dye back into the shirt.
3. Dab with a suitable ink treatment
For ballpoint and many gel pen marks, lightly dampen a cotton bud or white cloth with surgical spirit, isopropyl alcohol or a clear alcohol-based stain remover suitable for textiles. Dab from the outside of the mark towards the centre. Use small touches rather than soaking the whole area.
You should see ink transfer onto the cloth or the towel beneath. Replace the towel section regularly and continue gently. If the fabric starts to lose colour, the print dulls, or the fibres look roughened, stop the solvent stage and move to rinsing.
Avoid using coloured hand gel, perfume, nail varnish remover or household surface cleaners. They may contain dyes, oils, acetone, fragrance or additives that create a second stain or damage synthetic fibres.
4. Rinse from the back
Once the visible ink has reduced, rinse the back of the stain under cool water. This removes loosened dye and solvent residue. Squeeze the fabric gently; do not wring a formal shirt collar, cuff or branded panel, as twisting can distort the shape.
5. Pre-treat with laundry detergent
Work a small amount of liquid laundry detergent into the affected area with your fingertips. Leave it for 10 to 15 minutes, keeping the fabric damp. For powder detergent, make a small paste with water first so you are not rubbing dry granules into the weave.
On white cotton or robust white polycotton, an oxygen-based laundry stain remover may help with the remaining shadow if the care label allows it. Avoid chlorine bleach on coloured shirts, stretch fabrics and embroidered branding unless the care label specifically permits it, as it can weaken fibres and alter colours unevenly.
6. Wash, then inspect before drying
Wash the shirt according to its care label, usually at 30°C or 40°C for many office uniform shirts. Use the normal cycle unless the label says otherwise. After washing, check the stain in good daylight before drying. If any ink remains, repeat the treatment while the shirt is still damp.
Do not tumble dry or iron the shirt until the mark has gone as far as it realistically can. Heat is the point at which a treatable ink mark can become a permanent faint shadow.
Fabric-specific guidance for uniform shirts
White cotton shirts
White cotton is usually the most forgiving fabric for ink treatment. It can often tolerate repeated rinsing and detergent pre-treatment, but collars and cuffs can still distort if scrubbed. Keep treatment local and support the fabric flat while you work.
Polycotton shirts
Polycotton is common for office uniforms because it dries faster and creases less than pure cotton. Ink can sit differently on polyester fibres, and some stains cling stubbornly after heat exposure. Use light, repeated treatment rather than one heavy soak.
Coloured uniform shirts
Colourfastness matters more than stain strength. A pale ink ghost is often less noticeable than a bleached or faded patch on a navy, burgundy or black shirt. Always test the treatment first and keep oxygen stain removers for garments whose labels allow them.
Easy-iron and non-iron finishes
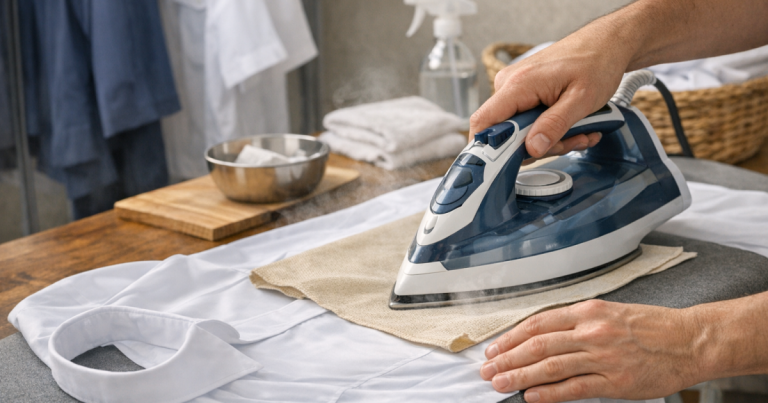
Easy-care finishes can make shirts look smart with less pressing, but harsh rubbing may leave a dull patch. After stain treatment and washing, press the shirt only once the fabric is clean. If the area needs careful finishing, our guide to choosing the right pressing cloth explains how to protect delicate surfaces, wool blends and smoother shirt fabrics from shine.
Embroidered logos and name panels
If the ink is near embroidery, treat the shirt fabric around it rather than soaking the stitched area. Threads may be dyed differently from the shirt and can bleed, dull or shrink if exposed to strong treatment. Blot from the back where possible and keep the logo supported flat.
If the ink stain is old or has already been washed
Older ink marks need patience. Start with the same method, but expect to repeat the blot, treat, rinse and wash cycle more than once. Keep each round gentle. If the ink has already been through a hot wash, tumble dryer or iron, the remaining dye may be fixed into the fibres.
To remove ink stains that have set, your best chance is repeated controlled treatment rather than stronger chemicals. Work for a few minutes, rinse, reassess and stop if the fabric begins to show wear. For a uniform shirt that must look presentable at a front desk, in a clinic, in hospitality or in a customer-facing office, a faint mark near a pocket may be less acceptable than on casual clothing, so replacement may be the more realistic option if the fabric is damaged.
Mistakes that make ink worse
- Rubbing hard: this spreads dye and roughens the shirt surface.
- Using hot water first: heat can help set some stains before the dye has loosened.
- Spraying random cleaners: surface cleaners are made for desks and counters, not shirt fibres.
- Soaking the whole shirt unnecessarily: ink can migrate into cleaner areas of fabric.
- Drying too soon: a faint stain can become much harder to treat after tumble drying or ironing.
- Ignoring transfer: if the towel beneath is covered in ink, move to a clean section straight away.
A simple office-uniform stain routine
For workplaces where pens, lanyards, ID clips and paperwork are part of the day, it is worth having a small stain routine at home. Keep white kitchen paper, a clean white cloth, liquid laundry detergent and a suitable textile-safe stain remover together so a marked shirt does not sit untreated in the laundry basket for several days.
Ask staff or family members to empty shirt pockets before the wash. One uncapped pen in a drum can mark several garments at once, including cuffs, collars and pale blouses. If the shirt is part of a limited uniform allowance, treating one small mark early is usually easier than rescuing a full load later.
Ink is not the only workwear problem that benefits from separating the stain from the fabric before washing. For heavier residues on trade or site clothing, the same principle of removing loose contamination first also applies when cleaning cement dust from work clothes.
Helpful questions
Can I use hairspray on ink stains?
Modern hairsprays are less reliable than older formulas and may contain conditioners, fragrance or resins that add residue. A controlled dab of suitable alcohol-based treatment is usually cleaner and easier to rinse.
Will milk remove biro from a work shirt?
Milk is an old home remedy, but it is slow, messy and not dependable on uniform fabrics. It can also leave protein residue that needs washing out. Use blotting, targeted treatment and detergent instead.
Can I treat an ink stain during my lunch break?
Blotting is useful straight away. Avoid applying strong products at work unless you can rinse the shirt properly, because partly dissolved ink can spread or leave rings if it dries in the fabric.
Should I bleach a white office shirt?
Only use bleach if the care label allows it, and be especially cautious with polycotton, stretch fabric and logos. Oxygen-based stain treatment is often a safer first option for washable white shirts.
What if the ink came from a pen that burst in the washing machine?
Do not dry the load. Separate the marked garments, blot obvious patches and treat each stain individually before rewashing. Check the drum and door seal for ink before running another load.
In brief
Ink on an office uniform shirt needs a methodical response: blot, back the stain with absorbent material, treat gently, rinse, pre-treat with detergent and wash only when the dye has lifted. Protect the shirt’s colour, logo and finish at every stage, and keep heat away until you are satisfied the mark has gone as far as it can.