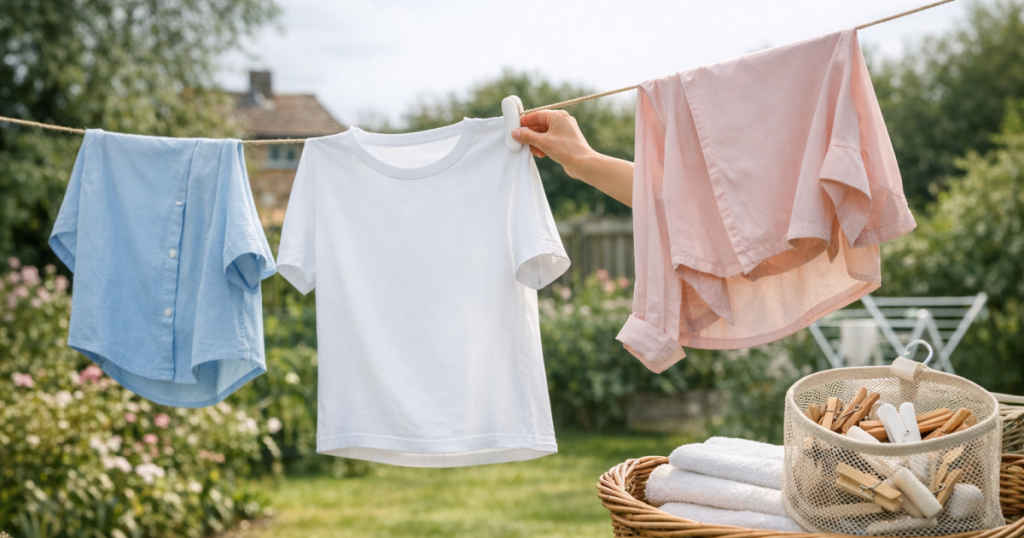
Peg dents can make a clean shirt look oddly neglected, particularly on cotton work shirts, school shirts and lightweight uniforms. The simplest way to hang shirts on a clothesline is to peg the strongest, least visible parts of the garment and keep the fabric supported while it dries. A few small changes to where you place the pegs, how wet the shirt is, and how much space you leave between garments can make shirts dry smoother and look better straight from the line.
The aim is not just to avoid visible marks. Good line-drying also helps reduce shoulder bumps, stretched collars, deep creases and that stiff, board-like feel that can happen when shirts dry too tightly bunched together.
At a glance
- Peg shirts at the side seams, lower hem or underarm seam rather than on the collar, shoulder or front placket.
- Use enough spin to remove heavy water, but avoid drying shirts in a twisted or crushed shape.
- Shake, smooth and button the shirt before hanging so the fabric dries in a neater position.
- Leave a few centimetres between shirts for airflow, especially in cooler UK weather.
- Use gentler, clean pegs and move them slightly away from the most visible areas.
Why peg marks happen
Peg marks are caused by pressure on damp fabric. When a peg clamps down on wet fibres, the pressure can leave a small dent, ridge or shiny flattened patch. The mark is usually most visible on smooth cotton poplin, fine school shirts, pale uniform shirts and synthetic-blend work shirts because these fabrics show pressure lines clearly.
Heavy water makes the problem worse. A shirt fresh from a low spin or hand wash may pull down under its own weight, so the peg has to grip harder to hold it in place. The wetter the fabric, the more easily it takes the shape of whatever is pressing against it.
Placement matters too. Pegs on collars, cuffs, shoulders or the button placket tend to leave marks where the eye naturally notices them. Pegs on seams, hems and underarm areas are less obvious because the fabric is already folded, stitched or hidden when worn.
Step 1: Start with the shirt in the right condition
A shirt should be damp, not dripping, before it goes on the line. If it is too wet, the fabric stretches, the hem pulls, and the peg pressure becomes more pronounced. For machine-washed shirts, a sensible spin is usually enough. For hand-washed shirts, press water out gently rather than wringing, which can twist collars and distort seams.
Before hanging, give the shirt two or three firm shakes. Hold it by the shoulders or side seams and let the body of the shirt open out. Smooth the collar, cuffs and button band with your hands. This quick step helps the shirt dry closer to its natural shape and reduces the amount of ironing or steaming needed later.
If the shirt is heavily creased straight from the wash, fasten the top button and one or two buttons down the front. You do not need to button the whole shirt, but a few buttons help keep the placket aligned and stop one side drying shorter or more wrinkled than the other.
Step 2: Choose the least visible pegging point
The best pegging point depends on the fabric, cut and space on your line. For most everyday shirts, the lower side seams are the safest place to start. The seam gives the peg something firmer to grip, and any small indentation sits near the side of the body rather than across the front.
For cotton work shirts
Hang the shirt upside down and peg at the lower side seams or along the hem close to the side seams. This keeps pegs away from the collar and shoulder area, where dents are more obvious. Cotton usually tolerates this well, provided the shirt is not soaking wet.
For school shirts and uniform shirts
Use two pegs at the lower hem, set slightly in from each side seam. Avoid clipping directly over the front button band, chest pocket or collar. Polyester-cotton school shirts often dry quickly, so they rarely need very firm pegging unless it is windy.
For linen or linen-blend shirts
Linen marks and creases easily, so use the side seams and avoid over-tight pegs. Shake the shirt well, smooth the front panels and leave extra space around it. Linen will still dry with texture, but you can prevent obvious peg dents by keeping pressure away from the front and shoulders.
For delicate or drapey shirts
Viscose, silk blends and very lightweight shirts can stretch if hung from the hem while too wet. For these, place the shirt on a hanger and hook the hanger over the line, or drape the shirt over the line at the underarm area and peg lightly on seams. Keep the garment out of harsh direct sun if the care label warns against it.
Step 3: Use pegs that do not crush the fabric
Old, dirty or very tight pegs are a common cause of visible marks. A peg with a rough edge, rusty spring or uneven jaw can imprint fabric and sometimes leave a faint dirty line on pale shirts. Before laundry day, quickly check the pegs you use most often and discard any that feel sharp, warped or gritty.
Soft-grip plastic pegs can be useful on smooth shirt fabrics, while wooden pegs are fine if they are clean and dry. The key is even pressure. A peg should hold the shirt securely without biting into one small point. If a peg leaves a deep mark on a tea towel or old cotton cloth, it is likely to mark a shirt too.
For windy days, use two pegs per shirt rather than one peg clamped hard in the middle. Spread the holding points across seams or hem edges so the fabric is supported without one crushed area taking all the strain.
Step 4: Hang by seams, not by the showy parts
Collars and shoulders may seem convenient, but they are often the worst places to peg. Collar points can dry with little flattened corners, and shoulder pegs can create bumps that are difficult to remove without steam. The front placket is also a poor choice because any dents sit right down the centre of the shirt.
Instead, use these lower-mark methods:
- Upside down by the side seams: Clip each peg over the lower side seam where the hem meets the stitched edge.
- Upside down by the hem: Place two pegs on the hem, away from the button band and pocket area.
- Over the line at the underarm: For lighter shirts, fold the shirt gently over the line at the underarm area and peg at side seams.
- On a hanger: Put the shirt on a smooth hanger, fasten a button, and secure the hanger so it cannot slide along the line.
If you use hangers outside, choose ones that support the shoulder shape smoothly. Thin wire hangers can create shoulder points on damp shirts, while bulky or textured hangers can leave ridges. A simple smooth hanger is usually enough for shirts that are not heavy with water.
Step 5: Give shirts enough space to dry cleanly
Shirts need airflow across both the front and back panels. If they touch each other, they dry more slowly and develop compressed creases where damp fabric rests against damp fabric. In mild, still or humid weather, leave at least 2–3 cm between shirts, and more if the fabric is thick or the cuffs are folded inwards.
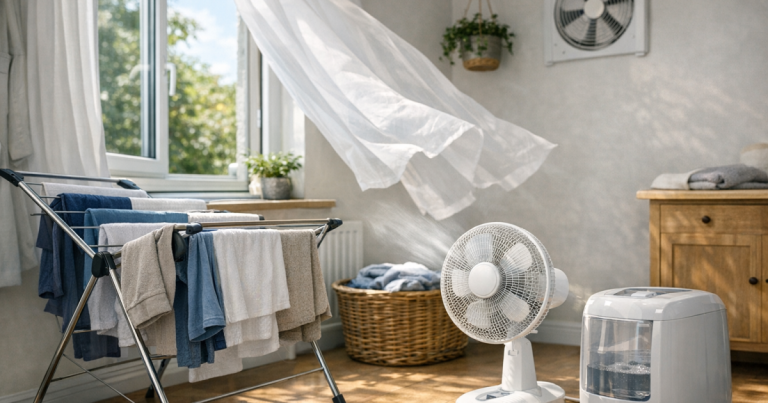
On a rotary line, hang shirts on the outer lines where there is more movement and air. On a straight washing line, alternate shirts with smaller items if space allows. Indoors, the same principle applies: spacing matters more than cramming everything onto the rack. For more detail on airflow indoors, see this guide to spacing clothes on an airer for faster drying.
Good spacing also reduces the urge to peg shirts too tightly. When fabric can move and breathe, it dries lighter and releases from the line more easily.
Step 6: Adapt the method to UK drying conditions
UK laundry weather can change quickly, so a method that works on a breezy spring morning may not suit a still, damp afternoon. In bright sun, turn dark or vivid shirts inside out to reduce visible fading on the outer surface. Peg them at seams and avoid leaving them outside longer than needed once dry.
In cooler months, shirts may dry slowly and hold peg pressure for longer. If they have been on the line for several hours and are still damp around cuffs, seams or collars, move them indoors with better spacing rather than leaving them limp and cold. Damp shirts left too long can smell stale, especially in houses with condensation or poor ventilation.
If wardrobes or indoor drying areas tend to feel clammy, it is worth reading about wardrobe dehumidifiers for damp clothes and mould prevention. Drying well is only half the job; shirts also need to be stored in a space that lets residual moisture escape.
Step 7: Remove shirts before they become bone dry
For easier finishing, take shirts down when they are dry or just barely damp at the seams. Bone-dry cotton can feel stiff and hold line creases more stubbornly. Slight residual moisture helps fibres relax when you smooth the shirt by hand, iron it or steam it.
Unpeg carefully rather than pulling the shirt away from the line. Pulling can stretch the hem and exaggerate any small peg mark. Lay the shirt over your arm, smooth the front panels, and button it on a hanger if you are not ironing straight away.
If a peg mark remains, lightly mist the area with clean water and smooth it between your fingers. For cotton and polyester-cotton shirts, a quick press or steam usually removes minor dents. If you regularly finish several shirts at once, a sensible home setup makes the job less irritating; this guide to setting up an ironing and steaming station explains how to keep the process practical in a real home.
Common mistakes that leave visible marks
- Pegging the collar: It is quick, but collar dents are highly visible and can make a shirt look misshapen.
- Using one peg in the centre: A single pressure point on the hem or placket can leave a clear dent and distort the shirt.
- Hanging shirts while dripping wet: The weight pulls the fabric down and makes peg marks deeper.
- Overcrowding the line: Bunched shirts dry slowly, crease more and often need more pressing afterwards.
- Leaving dry shirts outside too long: Once dry, continued sun, wind and peg pressure can make marks and stiffness more noticeable.
Best method for different shirt types
- Everyday cotton shirts: Hang upside down from the lower side seams using two clean pegs.
- School uniform shirts: Peg at the lower hem near the sides, keeping pressure away from pockets and the placket.
- Heavy overshirts: Use the hem and side seams, and make sure the garment is well spun before hanging.
- Lightweight blouse-style shirts: Use a hanger or drape gently over the line at the underarm seam.
- Dark shirts: Turn inside out, peg at seams, and avoid prolonged strong sun to help protect colour.
FAQ
Should shirts be hung upside down on a washing line?
For most cotton and polyester-cotton shirts, yes. Hanging upside down lets you peg the hem or side seams, keeping marks away from collars, shoulders and the front of the shirt.
How do I stop pegs leaving marks on school shirts?
Use clean, smooth pegs and place them at the lower hem close to the side seams. Shake the shirt first, avoid the collar and pocket area, and do not leave it pegged outside once fully dry.
Is it better to dry shirts on hangers?
Hangers are useful for delicate, lightweight or crease-prone shirts, provided the hanger supports the shoulders smoothly. For heavier wet shirts, remove more water first so the shoulders do not stretch.
Can peg marks be removed after drying?
Usually, yes. Lightly dampen the dent, smooth it with your fingers, then iron or steam the area according to the care label. Deep marks from very tight pegs may take more effort.
Do peg marks mean the shirt has been damaged?
Not usually. Most peg marks are temporary pressure dents. However, repeated strong pressure on delicate fibres, dark dyes or textured fabrics can contribute to wear over time.
Key takeaways
The neatest line-dried shirts come from a simple routine: remove excess water, shake the shirt open, peg at seams or hems, and leave enough space for air to move. Keep pegs away from collars, shoulders, pockets and the front placket, because these areas show every dent.
For sturdy everyday shirts, hanging upside down by the lower side seams is usually the most reliable approach. For delicate or drapey shirts, a hanger or gentle underarm drape is safer. Match the method to the fabric, the weather and how visible the pegged area will be when worn, and peg marks become much easier to avoid.