Indoor drying is often a balance between limited space, damp weather and clothes that need to be ready without smelling stale. The way you arrange clothes on an airer can speed up drying, reduce creasing and help fabrics keep their shape.
The aim is not to cram on as much as possible, but to create airflow around every item. A well-loaded airer dries more evenly, which matters for heavy cotton, school shirts, viscose dresses, knitwear and delicate pieces that should not be tumble dried.
The short version
- Shake each garment out before hanging so fabric layers are not stuck together.
- Put the heaviest, wettest items on the outer rails or highest sections where air moves most freely.
- Leave a small gap between garments rather than filling every rail.
- Spread thick items over two rails when possible, but avoid leaving deep folds that trap moisture.
- Hang shirts, blouses and dresses on hangers beside the airer if rail space is tight.
- Turn or re-position slow-drying items after a few hours, especially waistbands, cuffs and hems.
Start with the right load size
The fastest airer setup begins before you hang anything. If the wash load is too large for the drying space, clothes will sit pressed together and the damp air between them will have nowhere to go. This is one of the main reasons laundry smells musty even when it has been washed properly.
As a rough guide, one standard drying rack suits a modest machine load rather than a tightly packed drum. If you have washed towels, jeans, sweatshirts or bedding, split the load across two drying zones, use an extra hanger rail, or stagger the washing over the day. It is usually quicker to dry fewer items properly than to overload one airer and wait much longer.
Give each garment a firm shake before hanging. This separates stuck fabric layers, opens seams and removes some deep wash creases. For shirts and uniform tops, smooth collars, plackets and cuffs with your hands while damp; it can reduce the amount of ironing needed later.
Use the warmest airflow, not the hottest spot
An airer works best where air can move around it. A central position in a ventilated room is usually better than pushing it tightly against a wall, wardrobe or radiator. Leave space behind the airer so moisture is not trapped against paintwork or furniture.
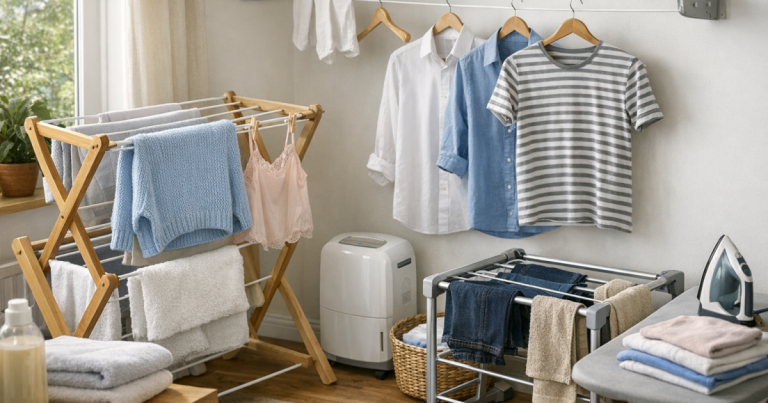
If you dry indoors regularly, crack a window when practical, use an extractor fan in a utility area, or run a dehumidifier according to its instructions. The goal is to remove moist air from the room, not simply warm it up. Warm, still air can hold moisture and slow the final stage of drying.
Avoid laying wet clothes directly over radiators unless the care label and fabric can tolerate that treatment. Direct heat can distort elastane, set creases, harden towels and create shiny or flattened patches on some fabrics. For a safer home setup, a free-standing airer with space around it is usually kinder to clothing.
Put heavy items where air reaches them first
Heavy garments need the best positions. Place jeans, hoodies, sweatshirts, thick joggers and towels on the outer edges or upper rails, where they are less boxed in by other items. If they hang in the middle of a crowded rack, they will often stay damp at the waistband, pocket area or hood long after everything else feels dry.
For jeans, hang them from the waistband over a rail with the legs separated where possible. If the legs are folded over one rail as a thick double layer, turn them halfway through drying. Open pockets with your fingers and smooth the waistband so moisture is not trapped in a compact band of fabric.
For hoodies, the hood is the usual problem area. Drape the body over one section, then pull the hood forward or to the side so it is not lying flat against the back. If the airer allows it, place the hood over a separate rail. The same idea applies to thick collars, ribbed cuffs and gathered hems.
Give shirts, blouses and uniforms more shape
Shirts and uniform tops dry better when they are opened out rather than folded into narrow strips. Fasten one or two top buttons, smooth the shoulders and either place the shirt across a rail by the underarms or hang it on a plastic or coated hanger near the airer. Hanging is particularly useful when rail space is limited.
For school shirts and work shirts, straighten the collar, cuffs and button band while damp. These areas are easier to shape before they dry into hard creases. If shiny marks are a recurring issue after drying and ironing, the next step is learning how to press them gently; see this guide to ironing uniform shirts without shiny marks.
Do not bunch several shirts together on one hanger or hook. They need space between sleeves and body panels. If you must dry several at once, alternate hangers with empty gaps so air can reach both sides.
Spread delicates without stretching them
Delicate fabrics benefit from airflow, but they also need support. Viscose, silk, fine knits and lightweight embellished garments can distort if hung from one narrow point while wet. Instead of clipping them heavily by the shoulders or letting them drag from a single rail, support more of the garment’s weight.
For viscose dresses, smooth the garment into shape and use a hanger only if the care label allows and the fabric is not heavy with water. Some viscose pieces are better dried flat or partially supported over multiple rails. If viscose shrinkage or twisting is a regular problem, read the detailed advice on washing viscose dresses without shrinking or warping before deciding how to dry them.
For silk blouses and scarves, keep them away from rough rails, sharp clips and direct heat. Use a smooth hanger or lay the item over a clean towel on a flat drying surface if the fabric feels fragile. Avoid leaving dark or strongly coloured delicates pressed against pale garments while wet, as dye transfer can happen during slow drying.
Use gaps as part of the drying method
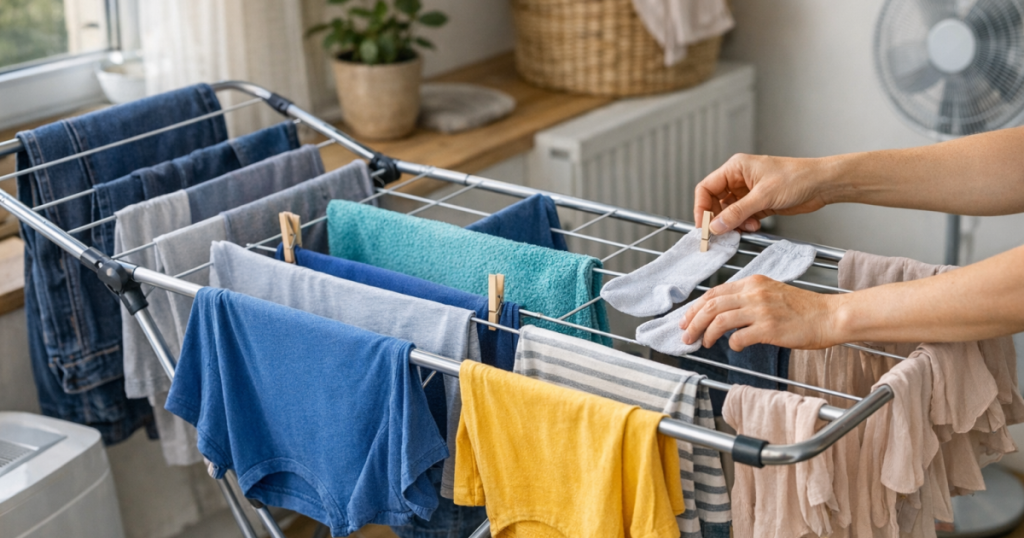
Empty rails are not wasted space. They create channels for air to pass through the rack. If you hang an item on every rail, the airer becomes a dense block of damp fabric. Leaving every third rail empty, or spacing garments by alternating sides, often dries clothes faster overall.
A useful pattern is to place large items on the outside, medium items in the centre and small items such as socks or underwear along lower or side rails. Keep socks paired loosely rather than folded together. For underwear and small delicates, spread waistbands and gusset areas so the thickest parts are exposed.
If your airer has wings, use them for lighter items or hanger-dried garments rather than loading every wing with heavy wet cotton. Too much weight on the outer sections can make drying uneven and may strain the airer. Keep the central frame stable and avoid letting long garments touch the floor.
Match the drying position to the fabric
- Cotton T-shirts: hang over one rail at the underarm line, then smooth the hem and sleeves so they are not folded under.
- Jeans and chinos: place on outer rails, open pockets and rotate once so seams and waistbands dry fully.
- School shirts: dry on hangers or across wider rail space, with collars and cuffs shaped while damp.
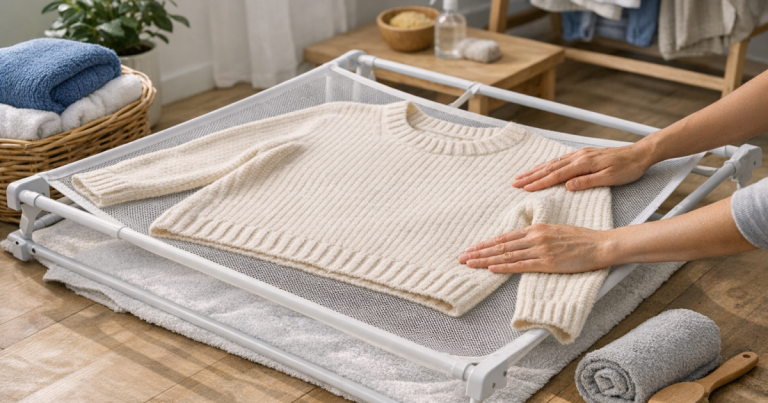
- Knitwear: avoid hanging heavy wet jumpers from the shoulders. Dry flat on a towel or across several rails to prevent stretching.
- Sportswear: separate synthetic layers and waistbands; these often dry quickly but can hold odour if bunched together.
- Viscose and rayon blends: support the garment’s weight and avoid tugging seams while wet.
- Towels: give them the outer rails, shake them well and turn them during drying so the folded edge does not stay damp.
When to use hangers, clips and extra drying space
Hangers can make an airer more efficient because they lift shirts, dresses and lightweight tops into open air instead of using several rails. Choose smooth hangers that do not leave shoulder bumps, and avoid narrow wire hangers on damp garments that could stretch or mark.
Clips are useful for small items, but they can leave dents on delicate fabrics and may hold thick hems in a damp pinch. Clip at seams or sturdier edges where possible. For bras, silk accessories and lace-trimmed items, a gentler setup is usually better than pegging tightly. Mesh bags are for washing rather than drying, but choosing them well helps prevent snagging before clothes reach the airer; this guide explains how to choose mesh wash bags for delicates.
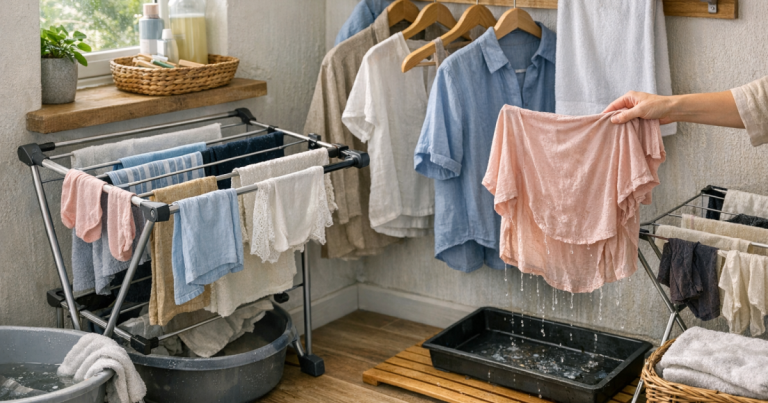
If water is still dripping from hand-washed items, do not load them straight onto a standard indoor airer over carpet or wooden flooring. Press out excess water in a towel first, then move the garment to a supported drying position. Very wet items slow the whole rack down and can create puddles beneath the airer.
Turn the awkward areas halfway through
Most garments do not dry at the same speed all over. Waistbands, cuffs, collars, hoods, pockets and double-layer hems are slower because they contain more fabric. After two to four hours, check these areas and re-position anything that still feels cold and damp.
Turn jeans inside out for part of the drying time if the pockets are slow. Flip T-shirts so the folded rail line is exposed. Move towels from a folded position to a more open drape once they are lighter. These small adjustments can save several hours, especially in cooler homes.
Do not put away clothes that feel only slightly damp at seams or thick edges. Wardrobes and drawers restrict airflow, so residual moisture can lead to creasing, musty smells and mildew risk. Let garments finish drying fully before storage.
Common airer mistakes that slow drying
- Overlapping sleeves and trouser legs: fabric dries where air touches it, so hidden layers stay damp.
- Using one rail for thick folded items: deep folds trap moisture. Spread heavy items over more space when you can.
- Drying in a closed, cold room: moisture needs a way out. Ventilation matters as much as warmth.
- Putting delicates under heavy garments: damp weight can crease, flatten or distort finer fabrics.
- Ignoring care labels: some garments need flat drying, drip drying or low-heat handling rather than standard rail drying.
- Leaving laundry overnight in a crowded rack: prolonged dampness increases odour risk, particularly with cotton and sportswear.
A simple loading order that works
For a mixed everyday wash, start with the bulkiest items. Put jeans, towels and sweatshirts on the outside or top rails. Next, place shirts and tops on hangers or open rails. Then fill side rails with lighter T-shirts, underwear and socks, leaving deliberate gaps through the middle.
Keep similar drying times together where possible. If small synthetic items dry quickly, remove them early rather than leaving them to block airflow. As the rack empties, spread the remaining damp items wider. The final stage is often where better spacing makes the biggest difference.
For delicates, separate them from heavy laundry altogether if space allows. A smaller, calmer drying zone protects shape and reduces the chance of colour transfer, peg marks or snagging.
Helpful questions
Should clothes be folded over one rail or spread over two?
Use one rail for light items if they have room around them. Use two rails for thicker garments, but smooth the fabric so the fold is not deep and trapped against itself.
Is it faster to dry clothes near a radiator?
Nearby warmth can help, but direct radiator contact is not ideal for many fabrics. Airflow and moisture removal are more reliable than strong direct heat.
Why do clothes smell musty after drying indoors?
The usual causes are overcrowding, poor ventilation, slow drying and putting garments away while seams are still damp. Wash freshness depends on drying speed as well as detergent.
Can knitwear go on an airer?
Yes, but heavy wet knitwear should be supported flat or across several rails. Hanging it from the shoulders can stretch the garment out of shape.
How much space should I leave between garments?
Even a small gap of a few centimetres helps. For heavy cottons, towels and jeans, leave more space and place them where air can reach both sides.
Main points
Faster airer drying comes from spacing, support and airflow. Load the heaviest pieces first, keep thick areas exposed, use hangers for shaped garments and move slow-drying items partway through. The best arrangement is the one that lets every layer breathe without stretching, scorching or crushing the fabric.
Once the clothes are fully dry, store them loosely rather than packing them straight into an overcrowded wardrobe. Good drying and good storage work together: dry garments keep their shape better, smell fresher and need less rescue care later.