Pleated school skirts can come out of the wash looking tidy but still lose their sharp lines once the iron touches them. The safest way to iron pleated school skirts is to press each fold back into position rather than dragging the iron across the fabric. A little clipping, steam control and patience will usually give a neater result than extra heat.
The main aim is to refresh the crease lines that are already there. If you flatten the skirt panel first and try to rebuild the pleats afterwards, you can make the job harder and sometimes soften permanent pleats in synthetic schoolwear fabrics.
At a glance
- Use the care label to choose the heat setting before you start.
- Work with the pleats, not across them.
- Press down and lift the iron; avoid sliding it from side to side.
- Use a cotton pressing cloth to reduce shine and protect polyester blends.
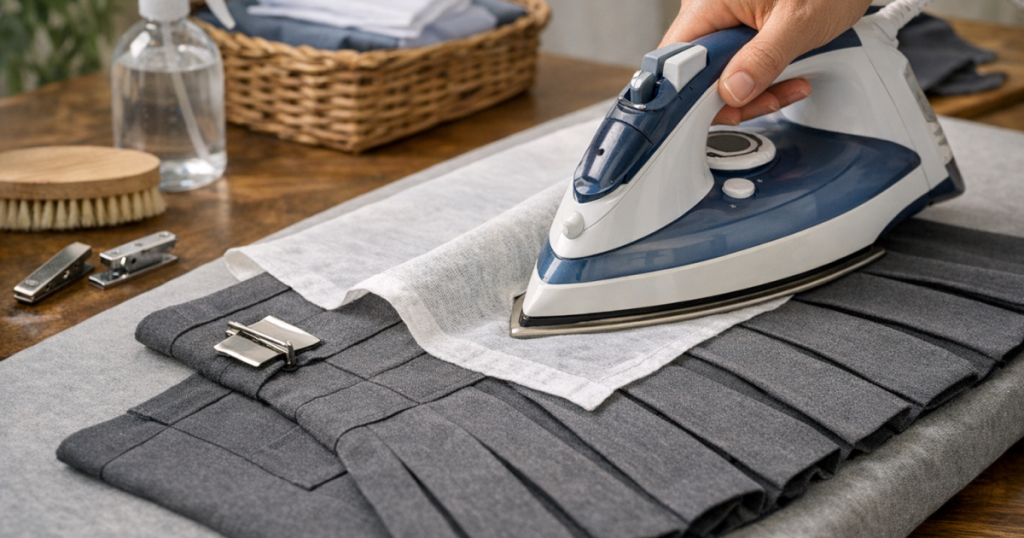
- Clip or pin pleats in place before pressing, keeping metal pins away from the iron plate.
- Let the skirt cool fully on a hanger before it is worn or put away.
Start with the care label
Most school skirts are made from polyester, viscose, cotton-rich blends, wool blends or easy-care synthetic fabrics. These can respond very differently to heat. Polyester blends are common in UK school uniforms because they wash and dry quickly, but they can develop shine, glazing or softened pleats if pressed too hot.
Check the ironing symbol before switching the iron on. One dot normally means low heat, two dots medium heat and three dots higher heat, but always follow the garment label over habit. If the label says do not iron, do not press the skirt directly; use steam from a distance or hang it in a warm room instead. If you are unsure what a symbol means, use our guide to reading laundry symbols before washing new clothes before treating a new uniform skirt.
What you need before you start
You do not need specialist equipment, but the setup matters. A stable ironing surface helps you line up the pleats without stretching them. A full-size board such as the Minky Homecare Ironing Board gives you more room to rotate the skirt than a small tabletop board, although any clean, padded ironing board can work.
You will need:
- A clean steam iron, such as the Philips Azur Elite Steam Iron, or another iron with suitable fabric settings.
- A plain white cotton tea towel or pressing cloth.
- Small clips, wooden clothes pegs or rust-free pins for holding pleats.
- A hanger with clips for cooling the skirt afterwards.
- A spray bottle of clean water if the skirt is badly creased and the care label allows damp pressing.
Avoid coloured cloths as pressing cloths because dye transfer is possible under heat and moisture. Also avoid using pins with plastic heads near the soleplate, as they can melt if touched by the iron.
Step 1: Make sure the skirt is clean and evenly dry
Ironing over food marks, mud, ink or deodorant residue can set stains more firmly into the fabric. If the skirt has visible marks, treat and wash it before pressing. A skirt should be dry or only very slightly damp when you begin; soaking wet pleats are harder to align and can dry into the wrong shape.
If you are trying to prepare uniform quickly for the next morning, dry the skirt properly before ironing rather than blasting it with high heat while wet. Our advice on drying school uniforms overnight without shrinking them can help when the whole uniform needs turning around quickly.
Step 2: Identify the type of pleat
Before pressing, look at how the skirt is constructed. Different pleats need slightly different handling.
Knife pleats
Knife pleats all fold in the same direction. These are common on school skirts and can twist if you drag the iron sideways. Line up each fold so the top edge, front fold and hem all point in the same direction.
Box pleats
Box pleats fold away from the centre on both sides, creating a wider flat section. Press the centre panel first, then press each outer fold separately. Do not squash the whole box flat unless the skirt was designed that way.
Stitched-down pleats
Some school skirts have pleats stitched down from the waistband to the hip. Press the stitched section gently and concentrate on the loose pleat below. Pulling hard at the lower section can strain the stitching or distort the skirt shape.
Step 3: Align and secure the pleats
Lay the skirt on the board with the waistband nearest you. Smooth the fabric with your hands, then pick one section to work on. Follow each pleat from the waistband or stitched line down to the hem, using the original fold as your guide.
Secure the pleats with small clips or wooden pegs along the hem. If the pleats are very mobile, add another clip halfway down the skirt. The clips are not there to stretch the fabric; they simply stop the folds wandering while you press.
If using pins, place them well away from where the iron will touch. Pinning through the seam allowance or close to the hem is usually safer than pinning across the visible front of the skirt. Remove pins as you move along so they do not leave dents in softer fabrics.
Step 4: Set the iron correctly
Start lower than you think you need, especially on synthetic schoolwear. A medium or low-medium setting is often enough for polyester blends when used with steam and a pressing cloth, but the label is the deciding factor. If the skirt contains wool, use the wool setting and plenty of protection from a damp pressing cloth.
Test on an inside hem or hidden seam before pressing the front. Look for shine, colour change, puckering or a change in texture. If any of these appear, lower the heat and increase the distance between the iron and the fabric by using a thicker pressing cloth.
Step 5: Press the waistband and top section first
Press the waistband before the pleats. This gives the skirt a stable starting point and stops the top section looking rumpled after the pleats are finished. Place the pressing cloth over the waistband, press down for a few seconds, then lift the iron away. Move along in short sections.
If the skirt has a zip, button or decorative trim, avoid pressing directly over it. Work around closures and use the tip of the iron carefully beside seams. Direct pressure over buttons can leave marks on the fabric below.
Step 6: Press each pleat without sliding the iron
Now work down the pleated section. Place the pressing cloth over the first aligned pleat. Put the iron down, hold it still briefly, then lift it straight up. Move to the next section and repeat. This press-and-lift motion is the key difference between tidying pleats and flattening them.
Do not sweep the iron across several pleats at once. That sideways movement can push folds out of line, blur the creases and create unwanted diagonal wrinkles. If you need steam, apply it through the cloth, then let the fabric settle before moving the skirt.
For stubborn crease lines, lightly mist the pressing cloth rather than soaking the skirt itself. Press, lift and allow the area to cool for a few seconds. Repeated moderate pressing is safer than one very hot press.
Step 7: Rotate the skirt and repeat in sections
Work around the skirt in manageable panels. Re-align the next group of pleats before pressing; do not assume they have stayed straight after you moved the garment. If the skirt has a side seam, use it as a visual checkpoint so the pleats remain evenly spaced.
When pressing near the hem, make sure the folded edges are still lined up. A neat hem is often what makes a school skirt look crisp, even if the upper pleats are partly hidden by a jumper or blazer.
Step 8: Let the pleats cool before moving the skirt
Heat relaxes fibres; cooling helps them hold the shape you have pressed. Once finished, hang the skirt from the waistband using a clip hanger. Let it cool fully before folding it, putting it in a wardrobe or wearing it.
If you need to transport the skirt, avoid folding through the pleats. Lay it flat, roll loosely around a towel, or hang it in a garment cover if you have one. Crushing a warm skirt into a bag can undo much of the work.
Common mistakes that flatten pleats
- Using too much heat: High heat can soften synthetic pleats and create shine, especially on dark navy, black or grey uniform fabrics.
- Ironing across the skirt: Sliding sideways blurs the fold lines and can pull pleats out of alignment.
- Skipping the pressing cloth: Direct contact may be fine for some cottons, but many school skirts benefit from a protective layer.
- Pressing dirty fabric: Heat can set marks and make later stain removal harder.
- Putting the skirt away while warm: Warm pleats crease again easily if compressed.
When steam is better than direct ironing
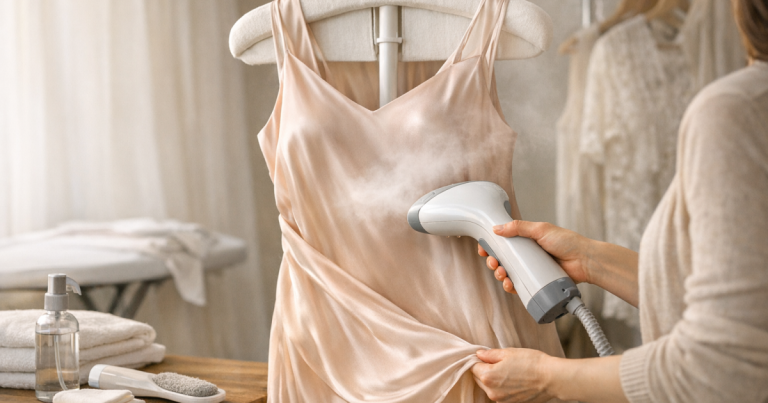
If the skirt is only lightly creased, steam may be enough. Hang the skirt, smooth the pleats by hand, then steam from a short distance without pushing the nozzle hard into the fabric. This can freshen the skirt between washes without re-pressing every fold.
Steam is also useful for delicate blends, skirts with trims or garments that say cool iron only. It will not rebuild completely lost pleats, but it can relax minor wrinkles. If you regularly refresh uniform or work clothing away from home, our guide to picking a travel steamer for work trips explains what to check before relying on a compact steamer.
What if the pleats have almost disappeared?
Some school skirts have heat-set pleats that gradually soften through wear, washing and tumble drying. You can improve the appearance by carefully following the original fold lines, but you may not fully restore a factory-set finish at home.
Use the stitching, seams and old crease shadows as a map. Clip the pleats in position, press through a damp cloth and let each section cool completely. If the pleats return but fade again quickly, reduce tumble drying, avoid overloading the washing machine and hang the skirt as soon as it is dry.
Common questions
Can I iron a pleated school skirt inside out?
Yes, and it is often a good idea for dark or shiny-prone fabrics. Pressing inside out reduces visible shine, but you still need to align the pleats carefully and use a pressing cloth.
Should I use starch on school skirt pleats?
Only if the care label allows it and the fabric responds well. Starch can make some synthetic blends feel stiff or patchy, so test inside the hem first and use very lightly.
Can I use hair straighteners on small pleats?
It is not recommended. Hair straighteners can be too hot, apply pressure unevenly and leave shine or scorch marks on schoolwear fabrics.
How often should I press the pleats?
Press when the folds look soft or after washing, rather than every wear. Between washes, hanging the skirt properly and using light steam can keep it presentable.
Why has my skirt gone shiny after ironing?
Shine usually comes from too much heat, too much pressure or direct contact with the iron. Lower the temperature, press inside out and use a clean cotton pressing cloth next time.
Why it matters
A pleated school skirt looks smarter when the folds are encouraged back into place instead of flattened into the fabric. Work slowly, protect the surface, press rather than slide, and give the skirt time to cool. That routine keeps uniform looking sharper for longer and reduces the temptation to use damaging heat when you are in a hurry.